本文共 5876 字,大约阅读时间需要 19 分钟。
最近在看Modbus协议,对里面的CRC校验程序有点懵,经过在网上找资料,自己整理了一下,做个笔记,方便以后查阅。
CRC计算方法有一种是直接算法:
1.设置CRC寄存器,并给其赋值FFFF(hex)。
2.将数据的第一个8-bit字符(将此8位高位补0为16位)与16位CRC寄存器的值进行异或,并把结果存入CRC寄存器。 3.CRC寄存器向右移(即最低位方向)一位,MSB补零,移出并检查LSB。 4.如果LSB为0,重复第三步;若LSB为1,CRC寄存器与多项式码(0xA001)相异或。 注意:该步检查LSB应该是右移前的LSB,即第3步前的LSB。 5.重复第3与第4步直到8次移位全部完成。此时一个8-bit数据处理完毕。 6.重复第2至第5步直到所有数据全部处理完成。 7.最终CRC寄存器的内容即为CRC值。另一种是查表法:
static const uint8_t s_CRCHi[] = {
0x00, 0xC1, 0x81, 0x40, 0x01, 0xC0, 0x80, 0x41, 0x01, 0xC0, 0x80, 0x41, 0x00, 0xC1, 0x81, 0x40, 0x01, 0xC0, 0x80, 0x41, 0x00, 0xC1, 0x81, 0x40, 0x00, 0xC1, 0x81, 0x40, 0x01, 0xC0, 0x80, 0x41, 0x01, 0xC0, 0x80, 0x41, 0x00, 0xC1, 0x81, 0x40, 0x00, 0xC1, 0x81, 0x40, 0x01, 0xC0, 0x80, 0x41, 0x00, 0xC1, 0x81, 0x40, 0x01, 0xC0, 0x80, 0x41, 0x01, 0xC0, 0x80, 0x41, 0x00, 0xC1, 0x81, 0x40, 0x01, 0xC0, 0x80, 0x41, 0x00, 0xC1, 0x81, 0x40, 0x00, 0xC1, 0x81, 0x40, 0x01, 0xC0, 0x80, 0x41, 0x00, 0xC1, 0x81, 0x40, 0x01, 0xC0, 0x80, 0x41, 0x01, 0xC0, 0x80, 0x41, 0x00, 0xC1, 0x81, 0x40, 0x00, 0xC1, 0x81, 0x40, 0x01, 0xC0, 0x80, 0x41, 0x01, 0xC0, 0x80, 0x41, 0x00, 0xC1, 0x81, 0x40, 0x01, 0xC0, 0x80, 0x41, 0x00, 0xC1, 0x81, 0x40, 0x00, 0xC1, 0x81, 0x40, 0x01, 0xC0, 0x80, 0x41, 0x01, 0xC0, 0x80, 0x41, 0x00, 0xC1, 0x81, 0x40, 0x00, 0xC1, 0x81, 0x40, 0x01, 0xC0, 0x80, 0x41, 0x00, 0xC1, 0x81, 0x40, 0x01, 0xC0, 0x80, 0x41, 0x01, 0xC0, 0x80, 0x41, 0x00, 0xC1, 0x81, 0x40, 0x00, 0xC1, 0x81, 0x40, 0x01, 0xC0, 0x80, 0x41, 0x01, 0xC0, 0x80, 0x41, 0x00, 0xC1, 0x81, 0x40, 0x01, 0xC0, 0x80, 0x41, 0x00, 0xC1, 0x81, 0x40, 0x00, 0xC1, 0x81, 0x40, 0x01, 0xC0, 0x80, 0x41, 0x00, 0xC1, 0x81, 0x40, 0x01, 0xC0, 0x80, 0x41, 0x01, 0xC0, 0x80, 0x41, 0x00, 0xC1, 0x81, 0x40, 0x01, 0xC0, 0x80, 0x41, 0x00, 0xC1, 0x81, 0x40, 0x00, 0xC1, 0x81, 0x40, 0x01, 0xC0, 0x80, 0x41, 0x01, 0xC0, 0x80, 0x41, 0x00, 0xC1, 0x81, 0x40, 0x00, 0xC1, 0x81, 0x40, 0x01, 0xC0, 0x80, 0x41, 0x00, 0xC1, 0x81, 0x40, 0x01, 0xC0, 0x80, 0x41, 0x01, 0xC0, 0x80, 0x41, 0x00, 0xC1, 0x81, 0x40 } ;const uint8_t s_CRCLo[] = {
0x00, 0xC0, 0xC1, 0x01, 0xC3, 0x03, 0x02, 0xC2, 0xC6, 0x06, 0x07, 0xC7, 0x05, 0xC5, 0xC4, 0x04, 0xCC, 0x0C, 0x0D, 0xCD, 0x0F, 0xCF, 0xCE, 0x0E, 0x0A, 0xCA, 0xCB, 0x0B, 0xC9, 0x09, 0x08, 0xC8, 0xD8, 0x18, 0x19, 0xD9, 0x1B, 0xDB, 0xDA, 0x1A, 0x1E, 0xDE, 0xDF, 0x1F, 0xDD, 0x1D, 0x1C, 0xDC, 0x14, 0xD4, 0xD5, 0x15, 0xD7, 0x17, 0x16, 0xD6, 0xD2, 0x12, 0x13, 0xD3, 0x11, 0xD1, 0xD0, 0x10, 0xF0, 0x30, 0x31, 0xF1, 0x33, 0xF3, 0xF2, 0x32, 0x36, 0xF6, 0xF7, 0x37, 0xF5, 0x35, 0x34, 0xF4, 0x3C, 0xFC, 0xFD, 0x3D, 0xFF, 0x3F, 0x3E, 0xFE, 0xFA, 0x3A, 0x3B, 0xFB, 0x39, 0xF9, 0xF8, 0x38, 0x28, 0xE8, 0xE9, 0x29, 0xEB, 0x2B, 0x2A, 0xEA, 0xEE, 0x2E, 0x2F, 0xEF, 0x2D, 0xED, 0xEC, 0x2C, 0xE4, 0x24, 0x25, 0xE5, 0x27, 0xE7, 0xE6, 0x26, 0x22, 0xE2, 0xE3, 0x23, 0xE1, 0x21, 0x20, 0xE0, 0xA0, 0x60, 0x61, 0xA1, 0x63, 0xA3, 0xA2, 0x62, 0x66, 0xA6, 0xA7, 0x67, 0xA5, 0x65, 0x64, 0xA4, 0x6C, 0xAC, 0xAD, 0x6D, 0xAF, 0x6F, 0x6E, 0xAE, 0xAA, 0x6A, 0x6B, 0xAB, 0x69, 0xA9, 0xA8, 0x68, 0x78, 0xB8, 0xB9, 0x79, 0xBB, 0x7B, 0x7A, 0xBA, 0xBE, 0x7E, 0x7F, 0xBF, 0x7D, 0xBD, 0xBC, 0x7C, 0xB4, 0x74, 0x75, 0xB5, 0x77, 0xB7, 0xB6, 0x76, 0x72, 0xB2, 0xB3, 0x73, 0xB1, 0x71, 0x70, 0xB0, 0x50, 0x90, 0x91, 0x51, 0x93, 0x53, 0x52, 0x92, 0x96, 0x56, 0x57, 0x97, 0x55, 0x95, 0x94, 0x54, 0x9C, 0x5C, 0x5D, 0x9D, 0x5F, 0x9F, 0x9E, 0x5E, 0x5A, 0x9A, 0x9B, 0x5B, 0x99, 0x59, 0x58, 0x98, 0x88, 0x48, 0x49, 0x89, 0x4B, 0x8B, 0x8A, 0x4A, 0x4E, 0x8E, 0x8F, 0x4F, 0x8D, 0x4D, 0x4C, 0x8C, 0x44, 0x84, 0x85, 0x45, 0x87, 0x47, 0x46, 0x86, 0x82, 0x42, 0x43, 0x83, 0x41, 0x81, 0x80, 0x40 };
首先来看看这个表是怎么来的。
CRC16算法的生成多项式x^16 + x^15 + x^2 + 1,十六进制表示为0x8005。 CRC16常见的表格中的数据是按照先传输LSB,消息右移进寄存器来计算的。因此需要判断寄存器的最低位LSB,同时要将0x8005 按位颠倒后(0xA001)根据LSB的情况决定是否与寄存器异或即可。
CRC16的表格中对应的数依次为0~255计算出来的CRC值,因此,此处只选取其中一两个数作为实例计算CRC值。
具体步骤如下所示:
1)从0~255中选取需要计算的数,将其对应的十六进制数放入一个长度为16的寄存器的低八位,高八位填充0;
2)如果寄存器的末位LSB为1,将寄存器的数值右移1位,再与0xA001位异或,否则仅将寄存器右移1位;
3)重复第2步,直到低八位全部右移出寄存器;
4)寄存器中的值则为校验码。
从0~255中挑选2(对应0x02)计算其CRC值:
00000000 00000010 <- 最低位LSB = 0, 高八位填充0
00000000 000000010 右移,高位填充0,并舍弃最后一位
----------------- 第一次计算
00000000 00000001 <- LSB = 1
00000000 000000001 右移,舍弃最后一位
^10100000 00000001 <-与0xA001异或
----------------- 第二次
10100000 00000001 <- LSB = 1
01010000 000000001右移,舍弃最后一位
^10100000 00000001 <-与0xA001异或
----------------- 第三次
11110000 00000001 <- LSB = 1
01111000 000000001右移,舍弃最后一位
^10100000 00000001 <-与0xA001异或
----------------- 第四次
11011000 00000001 <- LSB = 1
01101100 000000001右移,舍弃最后一位
^10100000 00000001 <-与0xA001异或
----------------- 第五次
11001100 00000001 <- LSB = 1
01100110 000000001右移,舍弃最后一位
^10100000 00000001 <-与0xA001异或
----------------- 第六次
11000110 00000001 <- LSB = 1
01100011 000000001右移,舍弃最后一位
^10100000 00000001 <-与0xA001异或
----------------- 第七次
11000011 00000001 <- LSB = 1
01100001 100000001右移,舍弃最后一位
^10100000 00000001 <-与0xA001异或
----------------- 一共右移了八次,得到的结果为CRC
11000001 10000001 <- CRC: 0xC1 81
从上表中可以看出s_CRCHi[]的第三个值就是0x 81,s_CRCLo[] 的第三个值就是0xC1。
弄清楚了表是怎么来的了,再来看看Modbus协议里CRC的程序:
//返回16位整数值。 对于Modbus ,此结果高字节先传送,低字节后传送。(此程序内部已执行高/低CRC字节的交换。)
uint16_t CRC16_Modbus(uint8_t *_pBuf, uint16_t _usLen)
{ //uint8_t ucCRCHi = 0xFF; /* 高CRC字节初始化 */ 初始化用设为00吗?因为CRC表格表是初始化0000得到的结果,如果初始化值为FFFF结果是不同的。自己备注uint8_t ucCRCHi = 0x00;//自己测试修改.,因为上面的CRC表格是以CRC寄存器默认值0000得出的数据表,所以这也应修改,实际测试这样才成功2020.11.2
//uint8_t ucCRCLo = 0xFF; /* 低CRC字节初始化 */初始化用设为00吗?因为CRC表格表是初始化0000得到的结果,如果初始化值为FFFF结果是不同的。自己备注uint8_t ucCRCLo = 0x00;//自己测试修改.,因为上面的CRC表格是以CRC寄存器默认值0000得出的数据表,所以这也应修改,实际测试这样才成功2020.11.2
uint16_t usIndex; /* CRC循环中的索引 */while (_usLen--)
{ usIndex = ucCRCHi ^ *_pBuf++; //与8位帧数据异或后,再做移位运算,相当于做了计算上表数据的过程ucCRCHi = ucCRCLo ^ s_CRCHi[usIndex];//此步可直接索引上表数据,但为什么不直接用索引数据,还要与ucCRCLo 异或?往下看ucCRCLo = s_CRCLo[usIndex];// } return ((uint16_t)ucCRCHi << 8 | ucCRCLo);//拼成2字节 16位 }unsigned char data1[] = { 1,2 };
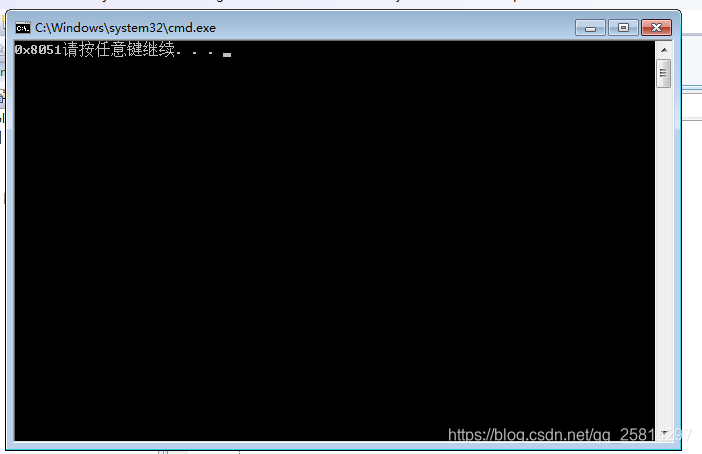
int main() { unsigned int data; data = CRC16(data1, 2); printf("0x%x",data);//0x8051高位80低位51,亲自测试通过2020.11.2 system("pause"); }先用直接算法举个例子:

转载地址:http://gcpb.baihongyu.com/